
SwiftUI로 새로운 프로젝트를 만들 예정인데, FCM을 사용하게 될 것 같아 Notification 테스트를 위해 사전 조사했던 부분을 정리한 포스팅입니다.
파이어베이스 콘솔에서 프로젝트 새로 생성
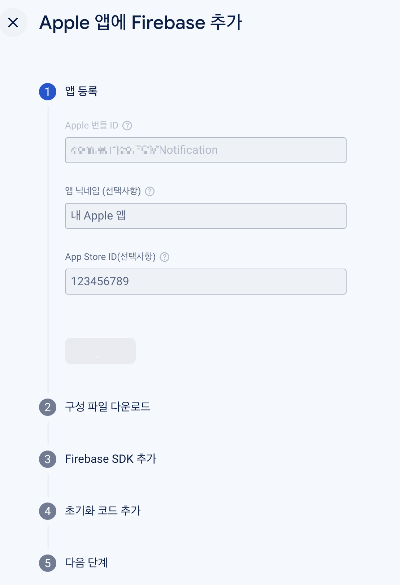
프로젝트 번들 ID 입력
App Store ID는 앱이 앱스토어에 등록된 경우에 등록한다. (웹으로 앱스토어 들어가서 앱 검색하면 URL 맨 뒤에 숫자 보이는 것이 App Store ID)
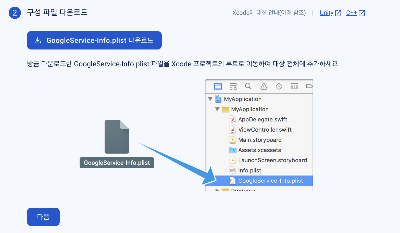
GoogleService-Info.plist 파일을 다운로드 받아 프로젝트 폴더에 추가
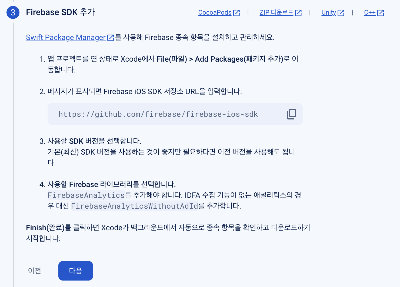
SPM에 firebase-ios-sdk 추가
우선은 FCM 테스트 용으로 생성하는 거라 Analytics랑 Messaging만 선택해서 추가했다.
import SwiftUI
import FirebaseCore

class AppDelegate: NSObject, UIApplicationDelegate {
  func application(_ application: UIApplication,
                   didFinishLaunchingWithOptions launchOptions: [UIApplication.LaunchOptionsKey : Any]? = nil) -> Bool {
    FirebaseApp.configure()

    return true
  }
}

@main
struct FCMNotificationApp: App {
    // register app delegate for Firebase setup
    @UIApplicationDelegateAdaptor(AppDelegate.self) var delegate

    var body: some Scene {
        WindowGroup {
            ContentView()
        }
    }
}파이어베이스 세팅을 위해 UIApplicationDelegate를 채택한 AppDelegate를 생성하고 main에서 delegate를 선언
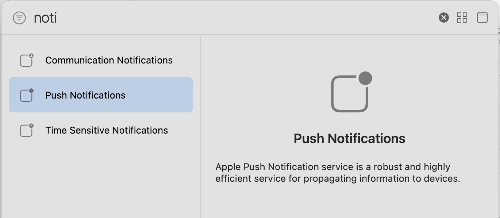
알림 수신을 위해 프로젝트 내에서 Push Notifications를 활성화
(Project > Targets에서 원하는 타겟 클릭 > Signing&Capabilities > +Capability에서 추가 가능)
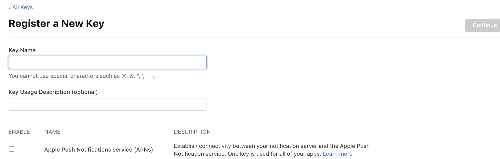
Apple Developer 사이트에서 FCM에 사용할 APNs 키를 발급
(애플 개발자 프로그램 유료로 등록한 사람만 발급이 가능하다)
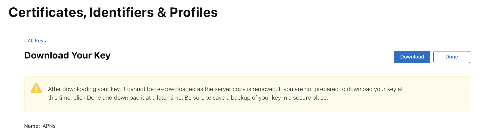
키를 발급 받으면 다시 재다운로드가 되지 않으므로 저장을 잘 하라는 경고가 뜬다.
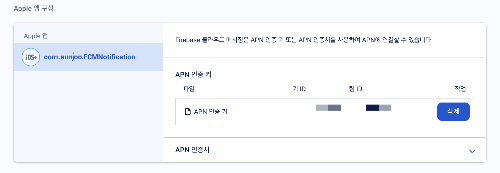
파이어베이스 프로젝트 설정 - 클라우드 메시징 탭 위에서 다운받은 APNs 인증 키 파일 (.p8)을 업로드하면 준비 완료
import SwiftUI
import FirebaseCore
import FirebaseMessaging

@main
struct FCMNotificationApp: App {
    // register app delegate for Firebase setup
    @UIApplicationDelegateAdaptor(AppDelegate.self) var delegate

    var body: some Scene {
        WindowGroup {
            ContentView()
        }
    }
}

class AppDelegate: NSObject, UIApplicationDelegate {
    func application(_ application: UIApplication,
                     didFinishLaunchingWithOptions launchOptions: [UIApplication.LaunchOptionsKey : Any]? = nil) -> Bool {
        FirebaseApp.configure()

        // 앱 실행 시 사용자에게 알림 허용 권한을 받음
        UNUserNotificationCenter.current().delegate = self

        let authOptions: UNAuthorizationOptions = [.alert, .badge, .sound] // 필요한 알림 권한을 설정
        UNUserNotificationCenter.current().requestAuthorization(
            options: authOptions,
            completionHandler: { _, _ in }
        )

        application.registerForRemoteNotifications()

        Messaging.messaging().delegate = self
        UNUserNotificationCenter.current().delegate = self

        return true
    }

    func application(_ application: UIApplication,
                     didRegisterForRemoteNotificationsWithDeviceToken deviceToken: Data) {
        /*
         you are building a SwiftUI app, you'll need to explicitly map your APNs token to the FCM registration token.
         */
        Messaging.messaging().apnsToken = deviceToken
    }
}

extension AppDelegate: UNUserNotificationCenterDelegate {
    // Foreground
    func userNotificationCenter(_ center: UNUserNotificationCenter, willPresent notification: UNNotification, withCompletionHandler completionHandler: @escaping (UNNotificationPresentationOptions) -> Void) {
        completionHandler([.list, .banner])
    }

    // Background or Terminated
    func userNotificationCenter(_ center: UNUserNotificationCenter, didReceive response: UNNotificationResponse, withCompletionHandler completionHandler: @escaping () -> Void) {
        completionHandler()
    }
}

extension AppDelegate: MessagingDelegate {
    func messaging(_ messaging: Messaging, didReceiveRegistrationToken fcmToken: String?) {
        /*
         기본적으로 FCM SDK는 앱을 시작할 때 클라이언트 앱 인스턴스의 등록 토큰을 생성합니다. APN 기기 토큰과 마찬가지로 이 토큰을 사용하여 타겟팅된 알림을 앱의 모든 특정 인스턴스로 전송할 수 있습니다.

         Apple 플랫폼이 일반적으로 앱 시작 시 APNs 기기 토큰을 전달하는 것과 마찬가지로 FCM은 FIRMessagingDelegate의 messaging:didReceiveRegistrationToken: 메서드를 통해 등록 토큰을 제공합니다. FCM SDK는 최초 앱 시작 시 그리고 토큰이 업데이트되거나 무효화될 때마다 신규 또는 기존 토큰을 가져옵니다. 어떠한 경우든 FCM SDK는 유효한 토큰이 있는 messaging:didReceiveRegistrationToken:을 호출합니다.
         */

        guard let token = fcmToken else { return }
        print("FCM Token: \(token)")

        // TODO: If necessary send token to application server.
        // Note: This callback is fired at each app startup and whenever a new token is generated.
    }
}위 코드가 SwiftUI에서 FCM을 통해 알림을 수신받기 위해 필요한 코드..!
FCM 공식문서를 확인해 작성했다.

실행해보면 FCM Token 값이 정상적으로 보여지는 것을 확인할 수 있다.
다음 포스팅은 포스트맨을 활용해 FCM 알림 테스트를 했던 내용을 작성할 예정입니다.
참고 사이트
'iOS' 카테고리의 다른 글
| Postman으로 FCM 테스트 (FCM API v1) (3) | 2024.10.06 |
|---|---|
| GCD (Grand Central Dispatch) 간단 정리 (0) | 2023.02.07 |
| iOS에서 json 처리하기 (0) | 2023.02.03 |
| View Life Cycle / Frame and Bounds (0) | 2023.02.03 |
| UILabel 원하는 범위만 색 변경하기 - NSMutableAttributedString 사용하기 (0) | 2022.01.16 |