이번에는 앞에 포스팅에서 안보였던 줄도 넣어보고, cell 배경색이나 UILabel 또는 UIButton을 넣는 등 UITableViewCell을 직접 커스텀해서 tableView에서 사용해보자.

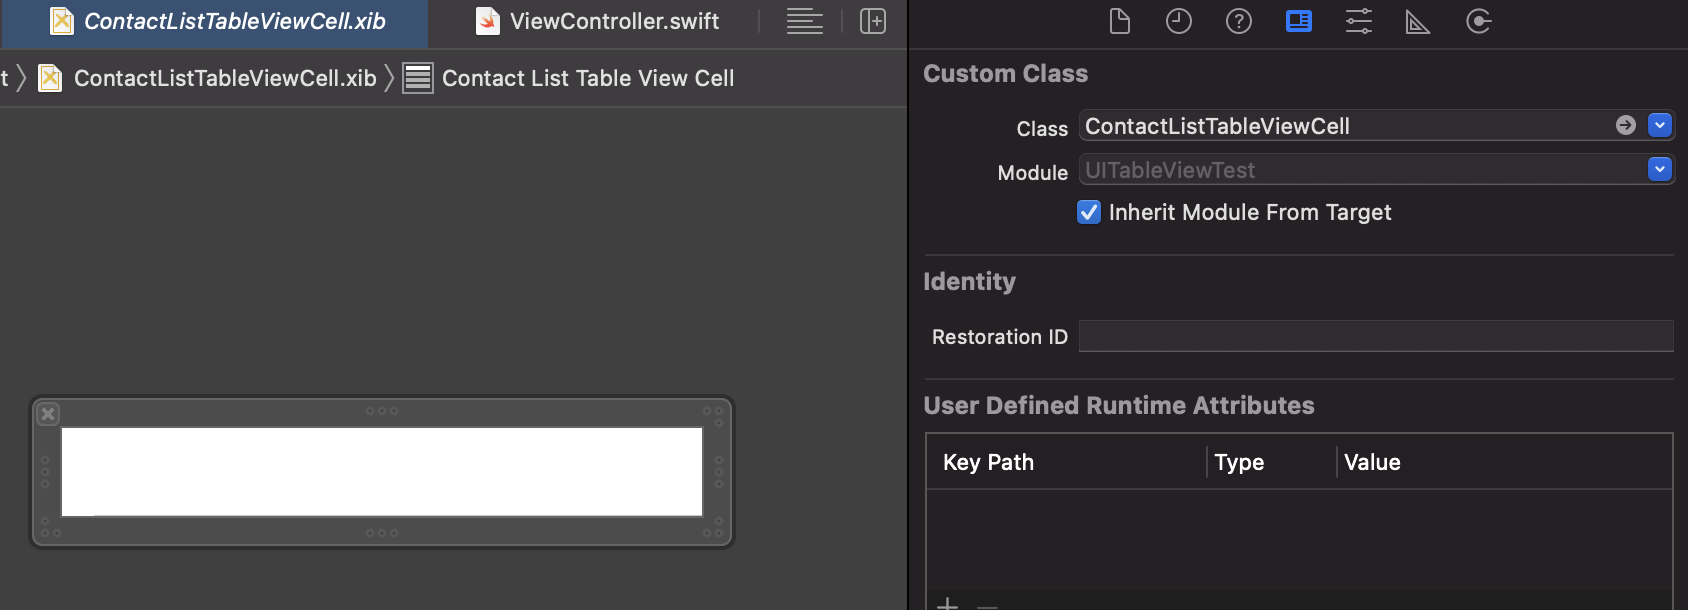
파일 생성 - Cocoa Touch Class를 선택하면 다음 화면에서 xib파일과 함께 클래스를 생성할 수 있다. SubClass에는 꽤 많은 종류가 있지만 이번에는 UITableViewCell을 선택한다.

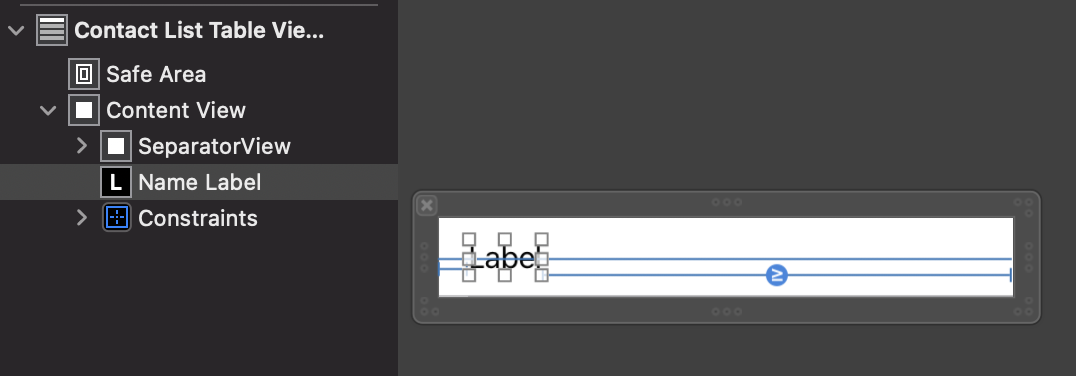
이렇게 만들면 자동으로 Class와 연결이 된 상태로 만들어져서 좋다. 그럼 이제 Cell을 구성해보자. 일단 Label을 넣고, cell 사이에 구분선을 만들어 준다. 버튼이나 다른 걸 넣으면 버튼의 동작을 받아 처리하는 메서드를 또 만들어주어야 하기 때문에 일단은 이전 포스팅에서 꼭 수정하고 싶었던 부분들만 바꾼다.

View를 cell의 Content View 안에 넣고 오토 레이아웃을 잡아준다. (leading: 0, trailing: 0, height: 1, 색상은 회색으로 했다.)
Label도 하나 추가해주었다. (leading: 16, trailing: >= 16, Align Center Y)
class ContactListTableViewCell: UITableViewCell {
    @IBOutlet weak var nameLabel: UILabel?

    override func awakeFromNib() {
        super.awakeFromNib()
        // Initialization code
    }

    override func setSelected(_ selected: Bool, animated: Bool) {
        super.setSelected(selected, animated: animated)

        // Configure the view for the selected state
    }
}Label에 이름이 들어가야 하기 때문에 outlet을 연결한다. (awakeFromNib과 setSelected는 아직 사용하지 않지만 일단 그대로 두었다.)
그럼 이제 내가 만들 cell을 테이블 뷰에서 사용할 수 있도록 UITableView가 있는 VC 클래스의 코드를 변경해보자.
우선 내가 tableView에서 Custom Cell을 쓰겠다고 선언을 해주어야 한다.

tableView의 register 메서드를 ViewController의 viewDidLoad 메서드에서 호출해준다. UINib을 가져올 때 nibName에는 xib 파일 이름을, forCellReuseIdentifier에는 만들어둔 cell xib 인스펙터에서 위에 사진에 보이는 곳에 입력한 이름을 넣어주면 된다.
override func viewDidLoad() {
       super.viewDidLoad()

       self.tableView?.register(UINib(nibName: "ContactListTableViewCell", bundle: nil), forCellReuseIdentifier: "ContactListTableViewCell")
}이렇게 내가 tableView에서 ContactListTableViewCell을 사용하겠다고 미리 알려주고 나면 이제 cellForRowAt에서 내가 만든 cell을 사용할 수 있게 된다.
func tableView(_ tableView: UITableView, cellForRowAt indexPath: IndexPath) -> UITableViewCell {
        guard let cell = tableView.dequeueReusableCell(withIdentifier: "ContactListTableViewCell", for: indexPath) as? ContactListTableViewCell else { return UITableViewCell() }

        cell.nameLabel?.text = self.contactsList[indexPath.row]

        return cell
}위 코드처럼 ContactListTableViewCell이라는 identifier를 가진 cell을 가져와서 ContactListTableViewCell로 형변환을 해주면 내가 만든 nameLabel에 접근이 가능하다.

Label과 아래 구분선이 추가된 cell을 사용해서 tableView에 데이터를 보여줄 수 있게 되었다!
나중에는 tableView에서 여러 종류의 custom cell을 가져다가 사용하는 경우도 종종 있을 텐데, 그때마다 cellForRowAt 메서드에서 모든 데이터를 직접 주입해주면 메서드 내부가 지저분해진다. 그럴 때는 custom cell 클래스 내부에 데이터를 설정해줄 메서드를 하나 두고, cellForRowAt 메서드에서는 cell 구성에 필요한 데이터들을 해당 메서드에 넘겨주자. 훨씬 깔끔해진다.
// VC의 cellForRowAt에서는 configure를 호출
func tableView(_ tableView: UITableView, cellForRowAt indexPath: IndexPath) -> UITableViewCell {
        guard let cell = tableView.dequeueReusableCell(withIdentifier: "ContactListTableViewCell", for: indexPath) as? ContactListTableViewCell else { return UITableViewCell() }

        cell.configure(name: self.contactsList[indexPath.row])

        return cell
}

// Custom UITableViewCell에서 text를 지정해준다.
func configure(name: String) {
        self.nameLabel?.text = name
}
그런데 실행하고 보니 콘솔창에 다음과 같은 워닝이 찍힌다.
[Warning] Warning once only: Detected a case where constraints ambiguously suggest a height of zero for a table view cell's content view. We're considering the collapse unintentional and using standard height instead. Cell: <UITableViewTest.ContactListTableViewCell: 0x152f11d10; baseClass = UITableViewCell; frame = (0 0; 375 44); autoresize = W; layer = <CALayer: 0x6000030ebc60>>
파파고의 도움을 받아보니 높이를 제대로 지정을 안 해줘서 그렇다고 한다. 해결하는 방법은 여러 가지가 있는 것 같다.
1. tableView 메서드 중 heightForRowAt 메서드를 사용하는 방법.
func tableView(_ tableView: UITableView, heightForRowAt indexPath: IndexPath) -> CGFloat {
    return 44.0
}이런 식으로 직접 return 특정 상수를 해주면 워닝이 사라진다.
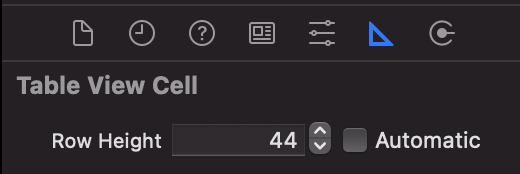
2. xib 파일에서 cell의 height를 지정하는 방법

xib파일에서 이 cell은 높이가 44입니다! 하고 지정해버리면 워닝이 안 뜬다.
3. 내가 만든 UITableViewCell에서 autoLayout을 통해 높이를 알 수밖에 없게 만들기
아까 xib에서 Label의 autoLayout을 잡을 때 Align Center Y를 주었는데, 이거를 top, bottom contstraint로 바꿔주었더니 워닝이 사라졌다.
제일 좋은 건 autoLayout을 정확하게 잡아서 tableView에서 cell을 사용할 때 확실하게 높이를 알 수 있게 만드는 게 제일 좋은 것 같다. 만약에 동적 높이를 가진 cell을 만들어야 한다면... 그땐 정말 autoLayout이 중요할 것 같다.
'iOS' 카테고리의 다른 글
| View Life Cycle / Frame and Bounds (0) | 2023.02.03 |
|---|---|
| UILabel 원하는 범위만 색 변경하기 - NSMutableAttributedString 사용하기 (0) | 2022.01.16 |
| [iOS] UITableView 예제 코드 만들기 1 (0) | 2021.10.12 |
| [iOS] UITableView 알아보기 (2) - UITableViewDelegate, UITableViewDataSource (0) | 2021.10.07 |
| Apple Developer Documentation에서 API Changes 확인하기 (0) | 2021.10.07 |
